

Having scoured so many vintage lens blogs and watched hours of vintage lens YouTube videos over the last few months, I was aware that lens elements could be reversed to achieve some quirky effects. It was something I hadn’t considered trying until I stumbled across Nadin Thomsons wonderful photography blog site. Here’s a link to Nadins site, it’s well worth making a visit – nadinthomson.co.uk
Nadin had posted an article, and some images (you can find it here), on how she modified a Helios 44-2. I thought her pics were great so, as I already owned a Helios 44-2, and it didn’t look too difficult, I was inspired to give it a go.
I bought a Newer lens spanner from Amazon which arrived yesterday. I then referred back to a YouTube video Nadin had suggested on how to go about removing the front lens and reversing it. You can find the video here. Incidentally, this guys YouTube channel is great for all things ‘vintage lens’ and he’s worth checking out on Flickr – here.
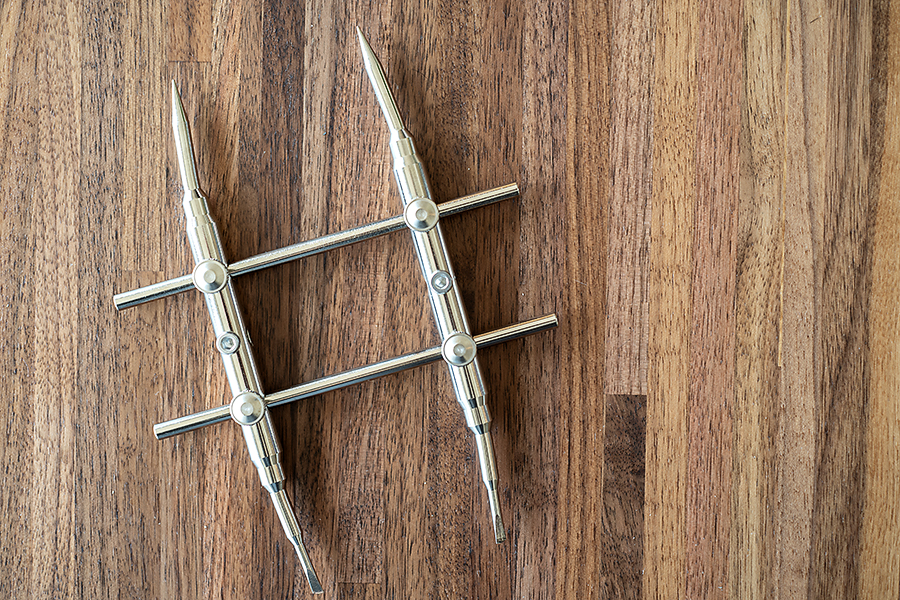
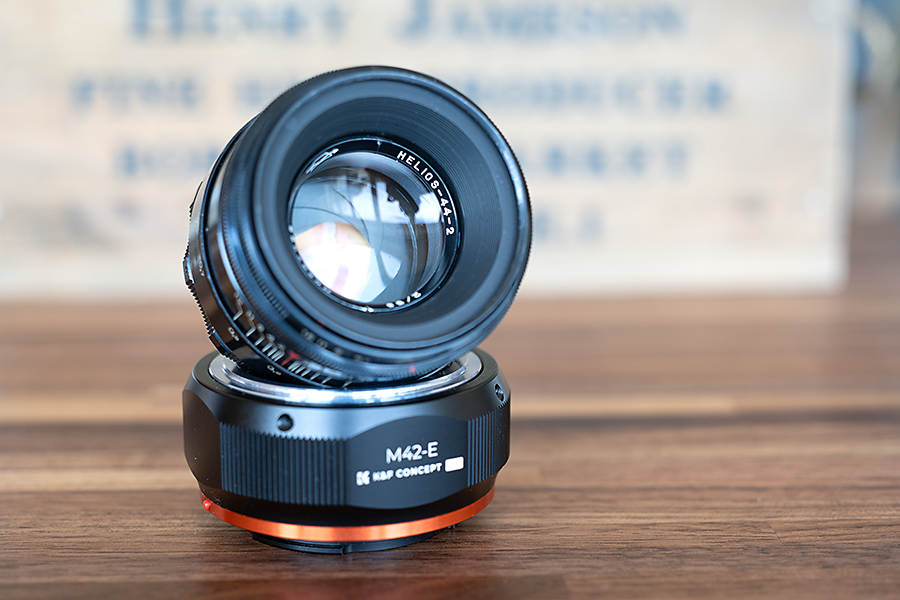
I had no problems using the spanner to remove the front element and then reversing it. It goes back into the barrel curved glass first. With my lens it rubbed up against the next glass element. A bit of research revealed that this is quite normal, so I tightened everything up and a quick check showed everything was working ok.
I’ve taken a few pics today to try out the new lens. It behaves nothing like a normal lens now and forget about getting anything super sharp. Focusing was ok with the lens wide open, but everything is still blurry and peak focusing is all over the place. I found using the image magnification on my Sony A7 was a big help although that’s also new and I’m still getting to know it.

So far I’ve found that the only sharpish area is in the center of the image. That’s good though as it forces me to get out of auto thirds mode or consider shooting wider with a crop in mind.
I also found that the aperture ring made a massive difference to the bokeh and could throw the focus out. Things became more weird and dreamy as I closed the lens down. At the same time as I turned the lens down the more blurred out the subject became. Anything past f11 was unusable with the subject losing all detail, although the backgrounds got better. I suppose a tripod and image blending might be the answer here but that’s not really my thing.
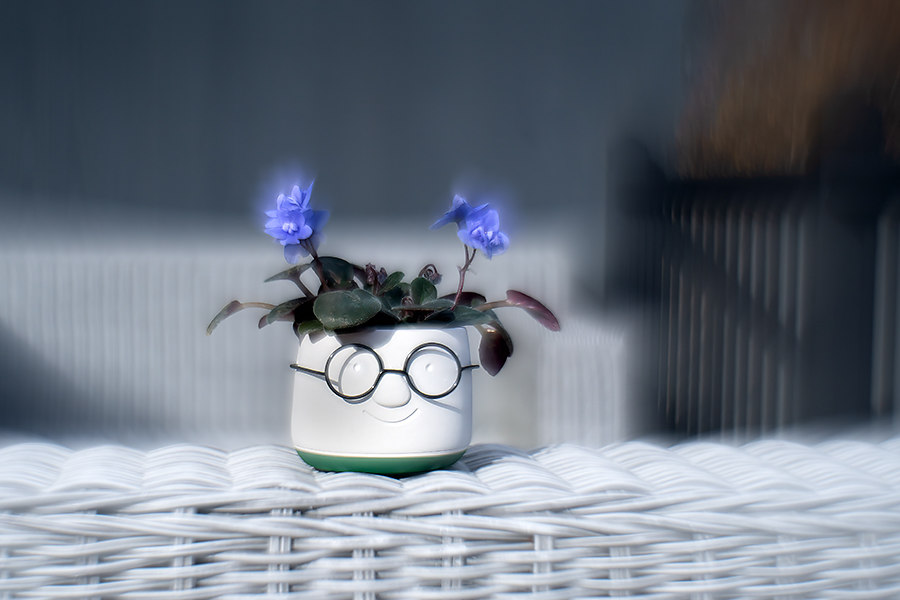
I’m hoping to get out and about with the modified lens over the next week and I’m really looking forward to getting to know it. First impressions have been really good and I’m happy with the results so far.
All images: ©Stephen Hyde 2007-2025 – All rights reserved.

Sounds like you’re having fun with it. Maggie
Excellent post, Steve! Well done on the reversing of the Helios, and your results are great! Looking forward to seeing more of this when the weather improves (or ‘if’ the weather ever gets better).
Thank you Keith. Weather is wet again today so I stayed put and stripped another lens. It’s a Carl Zeiss Flektogon that I bought as serviced. Unfortunately whoever serviced it had left a fingerprint on one of the inside elements! All sorted now though 🙂
Pingback: Lens-Artists Challenge #389 – Time To Relax | Steve Hyde
Pingback: Vintage Lenses – More adventures with my lens spanner | Steve Hyde